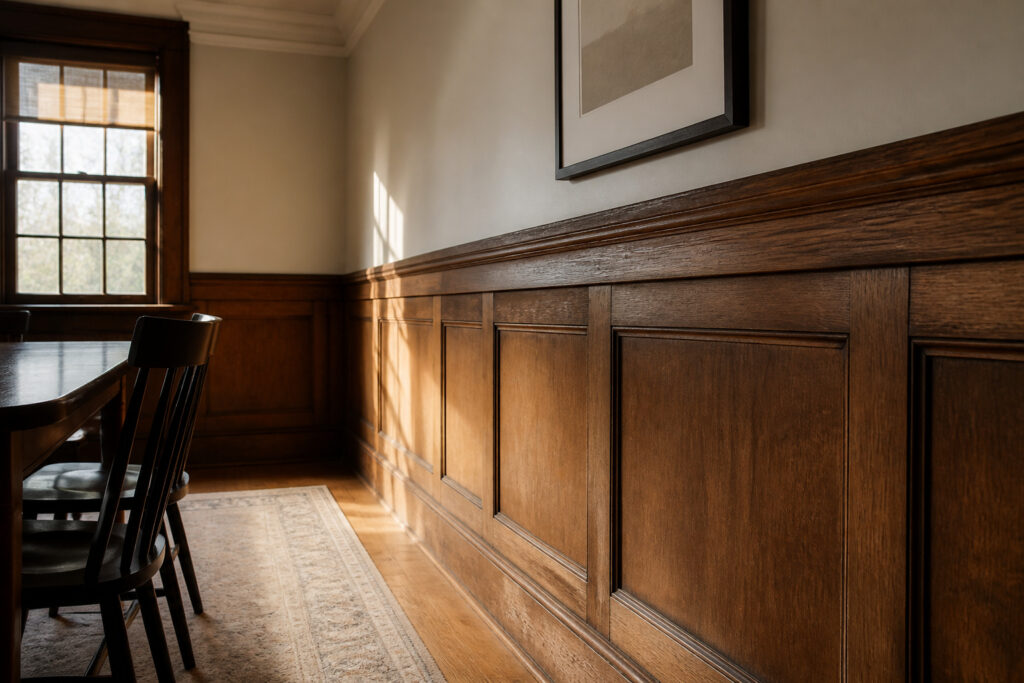
Wall trim types are the moulding, paneling, and wainscoting that finish the joint where wall meets floor, ceiling, or another surface.
The same strip of crown can read polished or amateur depending on whether you cope the inside corners or miter them; in older houses, walls rarely meet at true 90 degrees, and a mitered joint opens a hairline crack that catches shadow for years.
Paint-grade pine runs $1.50–$3 per foot if you own a miter saw and patience, or $8–$12 per foot if you hire out.
[link-whisper-related-posts]Applied Wall Moulding
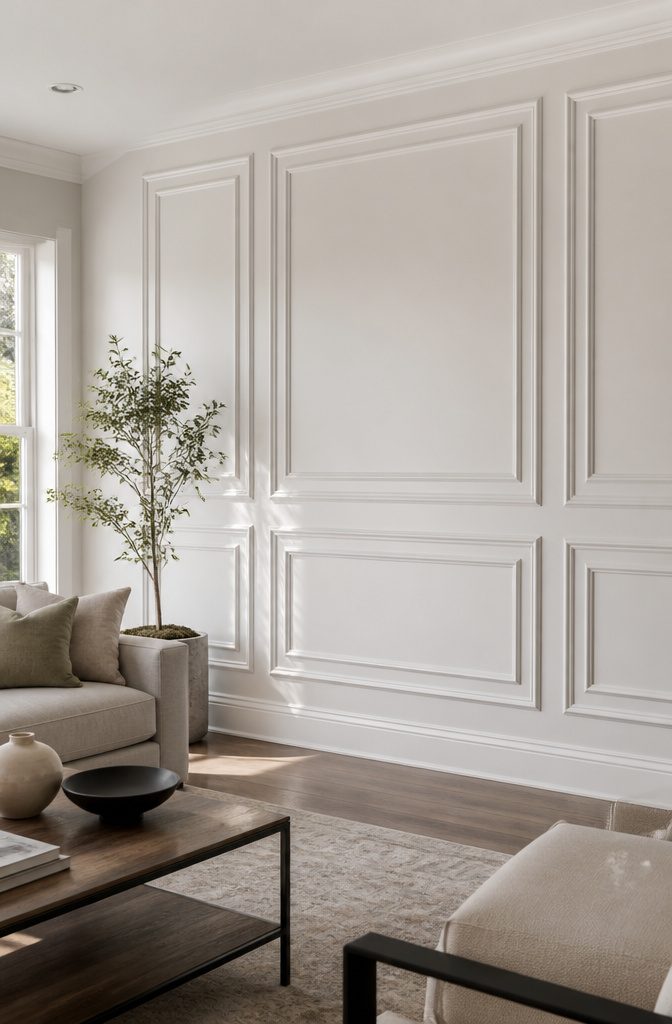
Applied wall moulding is the quickest way to add shadow lines and architecture without ripping out drywall.
Thin strips get nailed straight onto the painted wall in repeating rectangles, usually running from baseboard to chair rail height or framing a full wall in boxes.
The look is close to picture frame moulding, but the rectangles sit inside each other in stacked rows rather than floating as single frames. That rhythm reads as paneling from across the room, not wall art.
MDF works fine here since every edge gets painted, though wood holds crisper corners if you plan to stain.
My first attempt in a guest room looked crooked for months because I trusted my eye on spacing. Measuring every box with a story pole or marked level line saves the 40-minute tear-out I ended up doing.
A standard bedroom wall runs about $200–$400 in material, mostly depending on whether you spring for primed finger-joint pine or stick with MDF. Paint adds another afternoon, not another hundred dollars.

DIY Installation Made Easy: Cut, peel, and stick in just 3 simple steps. No special tools required. Effortless installation for a quick and hassle-free experience.
DIY Installation Made Easy: Cut, peel, and stick in just 3 simple steps. No special tools required. Effortless installation for a quick and hassle-free experience.
Board and Batten
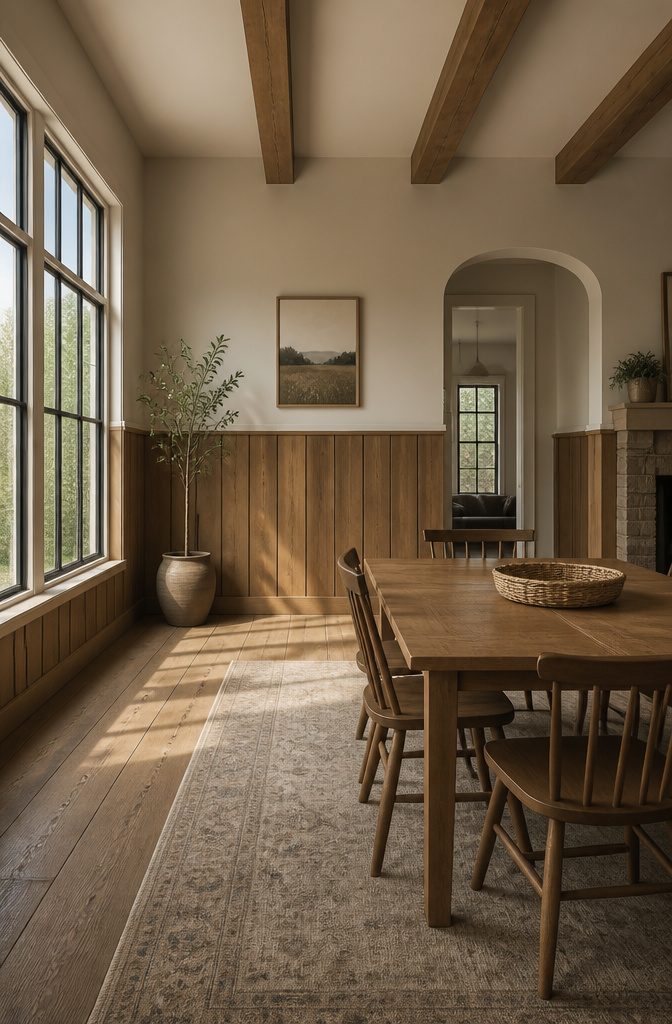
Board and batten brings exterior texture indoors through vertical boards with deliberate gaps between them.
The boards read as solid structure; the gaps read as shadow, which is why narrow boards on a tall wall feel like stripes on a circus tent rather than architecture.
A 1:3 ratio of board width to gap width usually settles the eye, though I have seen rooms where tighter or looser spacing worked because the ceiling was unusually low or the wall broken by windows.
The common mistake is scaling the boards down without scaling the room down.
A ten-foot ceiling wants boards with real presence; go too slim and the wall looks busy without looking built. MDF keeps the budget in weekend-project territory, but primer matters more here than with other trims.
Raw MDF edges drink paint and leave a speckled, thirsty surface that no second coat fully fixes. Prime every cut end before the board goes up, or the gaps will show exactly where you rushed.

Effortless Installation — Experience the simplicity of our 3-step installation process: simply cut, peel, and stick. It's a swift, hassle-free process.

Wall Molding Kit: The package includes 24 pcs wall molding (24in-14 pcs, 54in-6 pcs, 48in-4 pcs), which can be combined into 6 frames, allowing you to easily create a stylish accent wall. The 6-frame layout shown is designed for a wall measuring approximately 10 feet high by 11 feet wide. Please measure your wall and plan the layout before installation.

Pre-cut Wall Molding Kit : Our wall moldings include 22 pieces of 24 inch decorative strips and 12 pieces of 30 inch decorative strips.Can be freely matched according to your needs,bringing an elegant finished appearance to doors or walls
Raised Panel Moulding
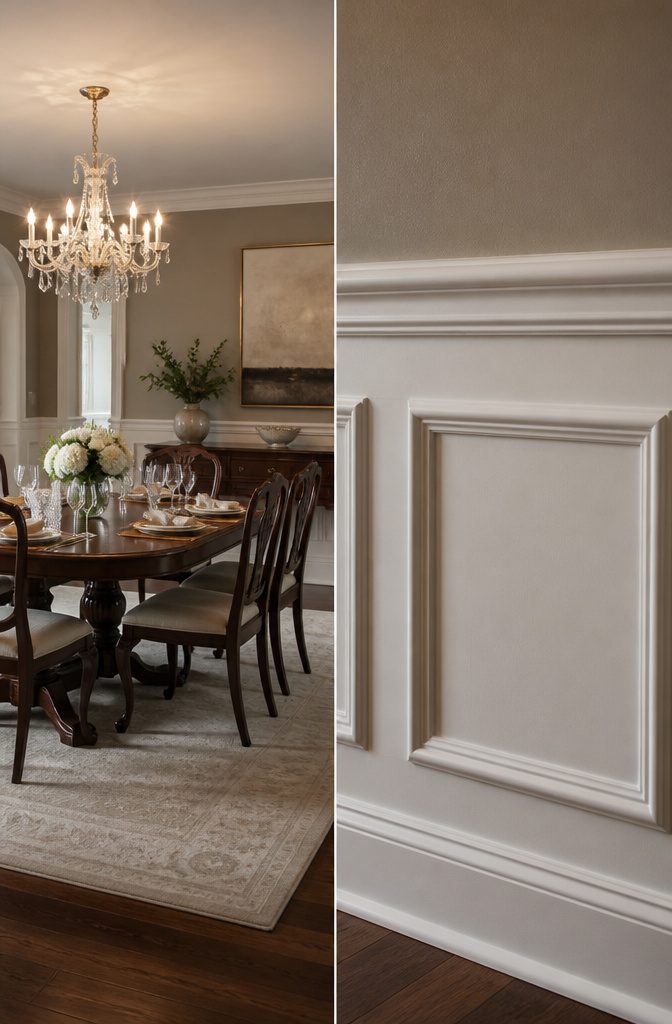
Raised panel moulding sits proud of the wall surface, the center panel literally beveled up from the frame that holds it.
That depth catches light differently than flat trim, which is exactly why the style reads as formal and almost colonial. Dining rooms and studies wear it naturally; the same profile in a laundry room feels like a costume.
Where this wall trim type used to demand a table saw and patience, prefab panels now click together with edges already mitered.
The time saved is genuine: a whole wall goes from Saturday morning to afternoon rather than eating your whole weekend. Big-box store stock runs $15–25 per panel in standard sizes, while anything custom-milled starts at $40 and climbs fast.
That gap matters because the look scales well; a single panel above a console reads intentional, not skimpy, so you rarely need the twelve-piece run that would blow a budget on custom work.
Proportion is what makes or breaks it. Prefab panels come in set dimensions, and trimming one down reveals the hollow core or breaks the bevel.
Measure your stud spacing against the actual panel width in the aisle, not the nominal size on the tag. I have seen a nearly perfect wall ruined by a two-inch gap the homeowner assumed would "get covered by caulk."

All-in-One Design - Package of 20 premade molding trim slat + 4 decorative edge strip create instant board & batten walls

Premade Board and Batten Paintable Wainscoting Kit: Package includes 20 premade molding trim slats, 4 decorative edge strips, and two pairs of gloves for convenient installation
All-in-One Design - Package of 10 premade molding trim slat + 2 decorative edge strip create instant board & batten walls
Beadboard
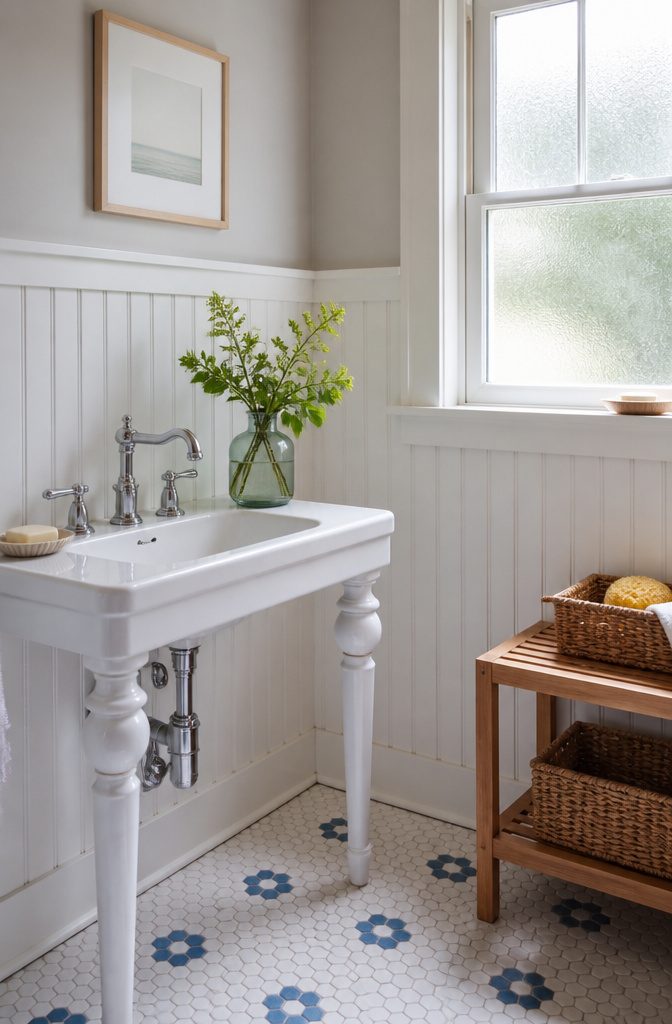
Beadboard is the wall trim type that comes as a series of narrow, vertical planks, usually with a small ridge or "bead" between each board. The look reads cottage or coastal, and it works anywhere you want texture without heaviness.
The first decision is sheet goods versus individual planks. Sheets are faster.
One 4×8 panel goes up in minutes and costs less per square foot. Individual planks take longer to install but handle uneven walls better and look more authentic at the corners, where sheets need careful seam work.
Moisture is where this choice gets serious.
MDF beadboard is common and cheap, but owners on Reddit warn against it for bathrooms. One user replaced swollen MDF baseboards after water damage and swapped to PVC for anything near humidity.
My own half-bath proved the point. I installed primed MDF beadboard first, and within two seasons the seams had puckered from shower steam that crept past a weak exhaust fan.
The boards looked fine from the doorway, but up close the edges had fattened like wet cardboard.
PVC beadboard went up the second time. It costs more and feels slightly hollow when you knock on it, but it cuts with ordinary trim saws and takes paint once you scuff the surface.
Two years later the seams stay tight. For any bathroom with a tub or shower, PVC is the material that survives real use.

Color and Size: our decorative line strips are made of non-traditional wood colors, which can easily blend into your decoration and add a touch of understated elegance; The size is 15.8 x 1.6 x 0.6 Inch (40 x 4 x 1.5cm), designed to an ideal proportion, easy to install, and will complement your wall

【Perfect Size – Flexible Coverage for Multiple Surfaces】9.8ft length with 0.4" width and 0.1" thickness, designed for versatile use on walls, tiles, mirrors, windows, and furniture edges. Ideal for accent walls, backsplash edging, baseboards, and DIY molding projects.

What You Will Receive: you will receive 3 sets of pre cut wall decorations, each set has 10 pcs, total 30 pcs, which can be freely matched according to your needs, they attaches easily and gives doors or walls elegant finished look
Wainscoting
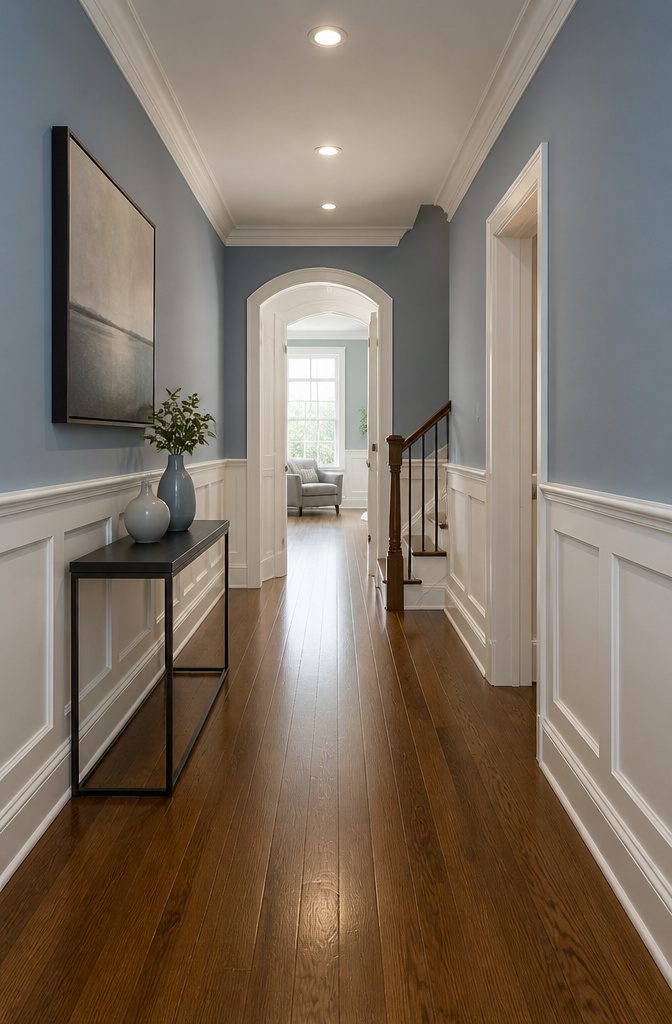
Wainscoting is paneling fixed to the lower third of a wall, capped by a chair rail that separates it from the painted plaster above.
The traditional height lands between 30 and 36 inches, roughly where a chair back would strike if someone scooted it backward hard.
In practice, that rule gets stretched constantly. My own living room stopped at 42 inches, and the wall looked stubby, like the paneling was wearing pants that pooled at the ankles.
The chair rail sat too high to protect against actual chairs and too low to read as deliberate proportion.
The term itself has gone loose in the last decade.
Any lower-wall treatment, beadboard, applied boxes, even a bold paint split, gets called wainscoting now. That looseness matters when you are searching for how-to videos and find a project that shares the name but not the method.
True wainscoting is built from panels, raised or flat, with stiles and rails that frame each section. The chair rail is not decorative extra; it is the cap that finishes the edge and takes the hit from furniture.
If you are measuring for your own wall, keep the top of the paneling at or below 36 inches unless your ceiling clears nine feet.
Past that, the eye reads the wall in thirds, and the upper field needs enough breathing room.

The Right Cut: Beautiful, seamless-fitting crown molding takes the guesswork out of crown molding

Precise Angle Measurer: The BORA MiteriX is specially designed to ensure that you measure the perfect angle for any corner, and it transfers that exact angle to your Miter saw for precise cuts. There’s no math, and it saves time and wasted material
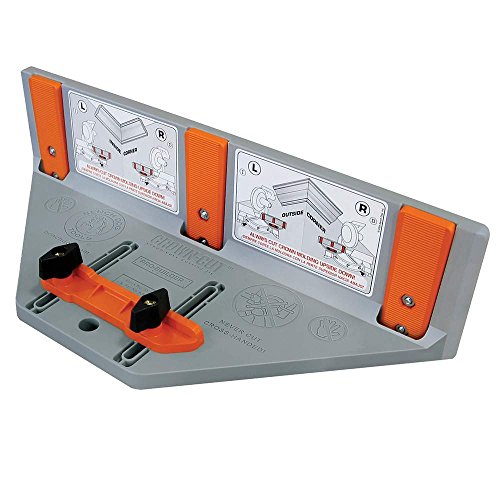
Effortless Precision: Cutting crown molding doesn't have to be difficult! This crown molding jig for miter saw simplifies the complication of cutting crown and cove molding, giving you perfect miters, every time
Shiplap
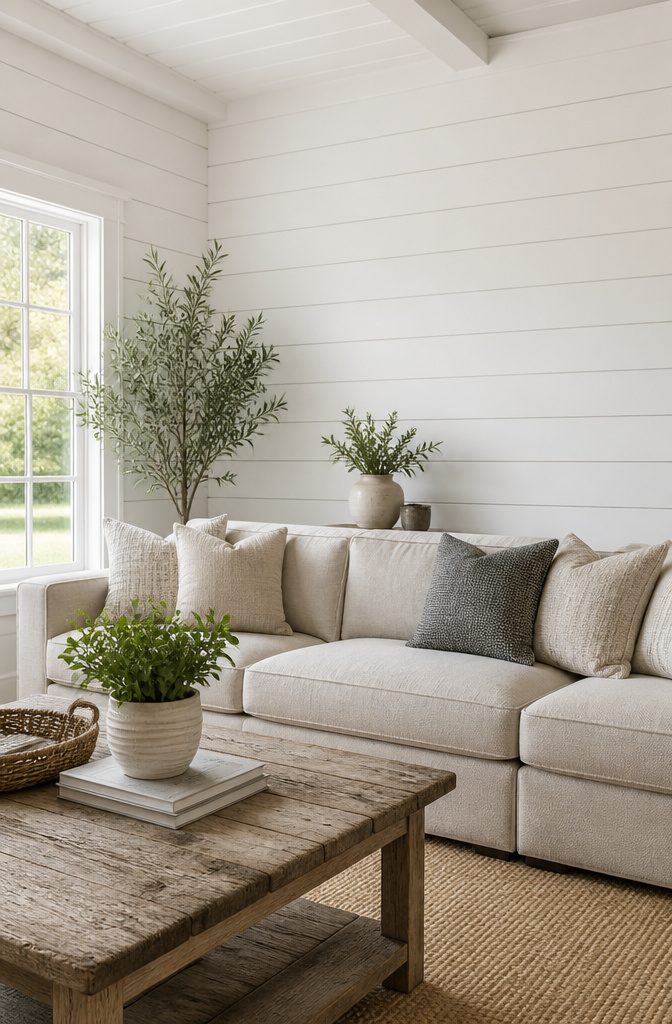
Overlapping wooden boards that create a rustic look, often used in modern farmhouse designs, sit somewhere between shiplap and the real thing depending on what you actually buy.
True shiplap carries a rabbeted edge, a small groove cut into each board so the next one laps over it cleanly and leaves that telltale shadow line.
Faux shiplap, usually just pine boards butted tight, skips that joint entirely and costs noticeably less per square foot.
The gap between boards determines whether the wall reads as relaxed cottage or sloppy construction. A nickel slipped on its edge gives the standard spacing, about two millimeters, enough to breathe without turning into a dust channel.
Paint sheen decides whether that gap stays a soft shadow or starts looking like dirt.
Flat paint absorbs the line; anything satin or above catches light across the recess and the eye reads grime. My bedroom ceiling ran $340 in pine, three days of overhead work, and one neck cramp that lasted a week.
The boards were light enough to install alone, but every cut at the miter saw meant climbing down, measuring, climbing back up. A helper at the chop station would have halved the time.

Generous Size: the package includes 1 roll of peel and stick chair rail panel molding, measuring about 32.8 ft x 1.6 inches/ 10 m x 4 cm, which provides you with adequate length to cover large areas; Additionally, its width adds a delicate and well defined edge to most applications, enhancing your decor with minimal effort

STRONG TRIM HOLD: Designed for hardwood trim and finish carpentry, these 2 inch nails grip dense wood firmly while keeping a low profile, holding moldings and trim securely in place for clean, long-lasting results. That delivers a reliable hold you
Crown Moulding
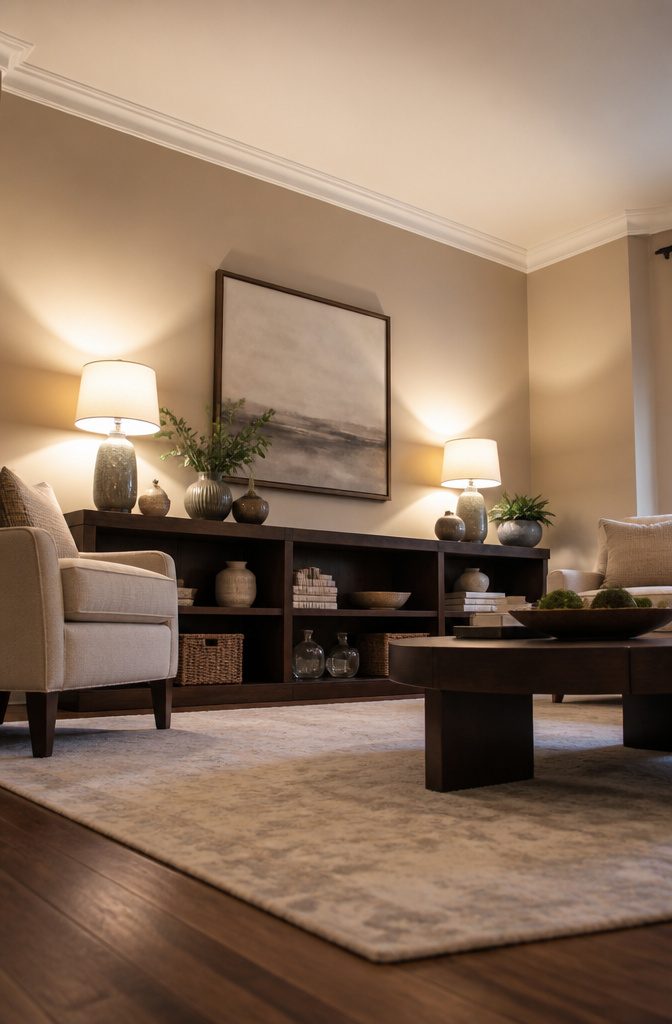
Crown moulding sits where the wall meets the ceiling and does the most visual work of any trim for the least square footage.
A plain room with crisp crown reads finished; the same room without it reads like a box that someone forgot to complete.
The real decision comes at the corners. Coping beats mitering for inside corners, especially in older houses where walls meet at something other than 90 degrees.
A coped joint is back-cut so one piece overlaps the profile of the other; it closes up tight even when the corner is off.
Mitered inside corners look faster on paper and spend the next ten years opening a hairline crack that catches shadow every evening.
Spring angles, the tilt built into the back of the crown, matter because they change how the molding sits against the wall and ceiling.
Standard 38/52 and 45/45 springs need different saw settings; grabbing the wrong one turns a careful cut into scrap.
Pre-finished polyurethane skips the sanding and priming stage entirely, which matters on a weekend timeline.
It is softer than wood and will dent if you whack it moving a ladder, but for a painted finish in a bedroom or dining room the time savings is real.
Hiring out runs $8–12 per foot installed. Paint-grade pine and a miter saw put the material cost closer to $1.50–3 per foot, though the learning curve on the first corner is steep enough that you should buy an extra length.

Premium Acrylic Construction:Made of high-quality, thick acrylic that resists warping, cracking, and yellowing over time. The smooth mirror-like finish adds a modern decorative touch to any room

Peel and Stick Wall Molding Kit : Our wall moldings include 18 pieces of 24 inch decorative strips and 12 pieces of 27 inch decorative strips.Can be freely matched according to your needs,bringing an elegant finished appearance to doors or walls

【Flexible Peel and Stick Molding Trim】20ft (6.1m) long × 0.25in (6.4mm) wide × 0.04in (1mm) thick. Please note: this is a slim, narrow trim (about the width of a pencil), designed for fine decorative edges. If you need a wider molding for stronger visual coverage, we recommend choosing our 2/5 or 4/5 width options. It is also suitable for slightly curved edges and detailed decorative finishes.
Chair Rail
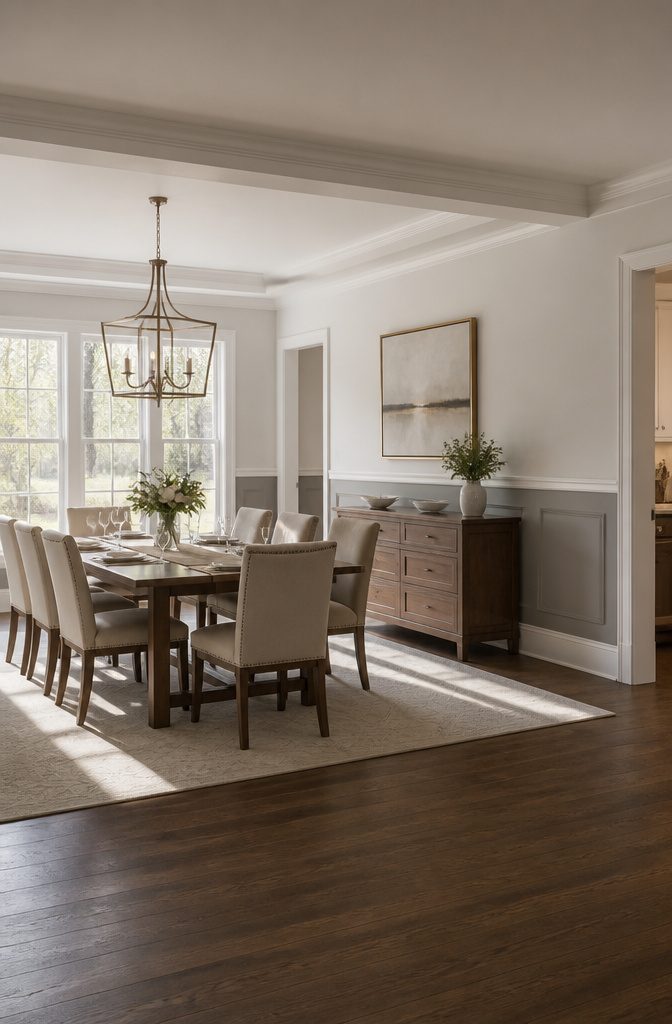
A chair rail is a horizontal strip of moulding set 30 to 36 inches above the floor, originally meant to take the hit from a chair back before the plaster did.
The 32-inch height you see most often traces back to Victorian dining rooms, where it actually served that purpose rather than just looking like it might.
In an old house with defined rooms, a chair rail has natural beginnings and ends at every doorframe.
Open-plan layouts break that logic. The rail stops at a doorway with nowhere to go, and wrapping it around a corner into a space with a completely different function looks like an afterthought.
I ran into this in a previous place: the rail butted into a kitchen peninsula with no logical path forward, and wrapping it would have meant carrying dining-room formality into a cooking zone where it made no sense.
Ripping it out took an afternoon and left cleaner sightlines than forcing the connection would have.
Materials run from wood to ceramic, stone, or metal, and the finish can either match your baseboards or deliberately contrast.
Used alone, it splits a wall into proportions that feel less cavernous. Used with crown moulding or wainscoting, it needs to read as part of a system rather than a band-aid at chair height.

Quantity and Coverage: this board and batten wall panel kit includes 42 pre cut MDF strips, each approx 3.15"W x 0.35"T; The finished wall coverage is approx 157.5 x 94.5 inches/ 400 x 240 cm: simply measure your wall and order the exact number of kits needed

MDF Material for Lasting Use: this board and batten wall panel kit is made from MDF, offering sturdiness and water resistance; The surface is smooth, providing a comfortable touch for interior wall applications

Board and Batten Wall Design : Include 10 premade molding trim slats and 2 decorative edge strip. No measuring or extra shopping. Everything you need for a accent wall, ready to assemble right out of the box
Baseboards
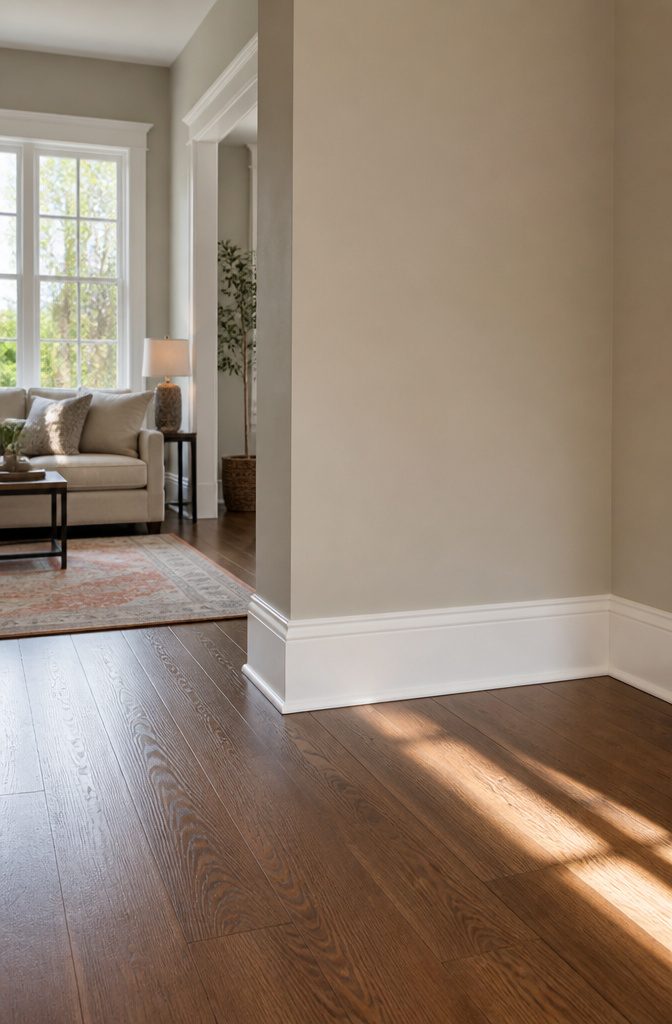
Baseboards sit where the wall meets the floor, hiding the gap that opens and closes as the house breathes through seasons.
The standard 3-1/4 inch height disappears into most rooms without comment, but stepping up to 5-1/4 inch changes how the whole wall reads. The taller board catches more shadow and gives even cheap drywall the weight of something finished.
In my first place I went with the smaller size to save ten dollars per stick, and I still notice how the room looks stopped short.
Quarter-round shoe moulding runs in front of the baseboard proper, pressed tight to the floor. It is there for forgiveness.
Floors are never perfectly flat, and the shoe bends over gaps that would otherwise collect dust and stare back at you. Without it, every wobble in the subfloor becomes a small confession.
Removing old baseboard demands scoring the caulk line first. Paint bridges the gap between board and wall, and pulling dry rips a ragged strip halfway up the drywall.
My hallway still carries the patch where I learned this. A utility knife run along the top edge costs two minutes and saves an hour of spackle work.
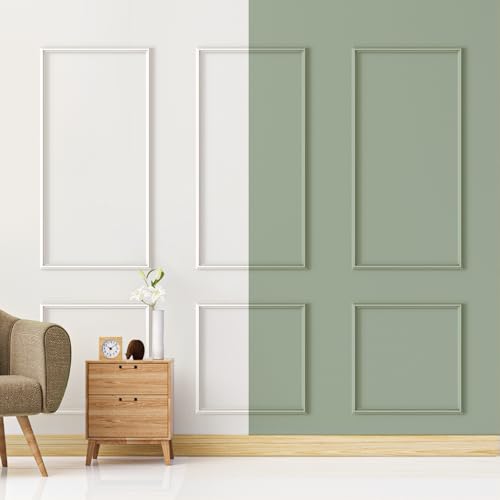
[Transformative Interior Decoration]: Our pre-made wall moulding kit effortlessly adds depth and character to your wall, blending contemporary minimalism with classic design. Elevate your interior wall with timeless elegance

Classic Beaded Design: It features a modern beaded design with a refined, raised 3D bead texture. It adds depth, elegance, and a touch of traditional sophistication to mirrors, doors, headboards, furniture, and walls

DIY Installation - Installation is a snap with our simple 3-step process: cut, peel, and stick. It's quick, effortless, and requires no special tools
Picture Frame Moulding
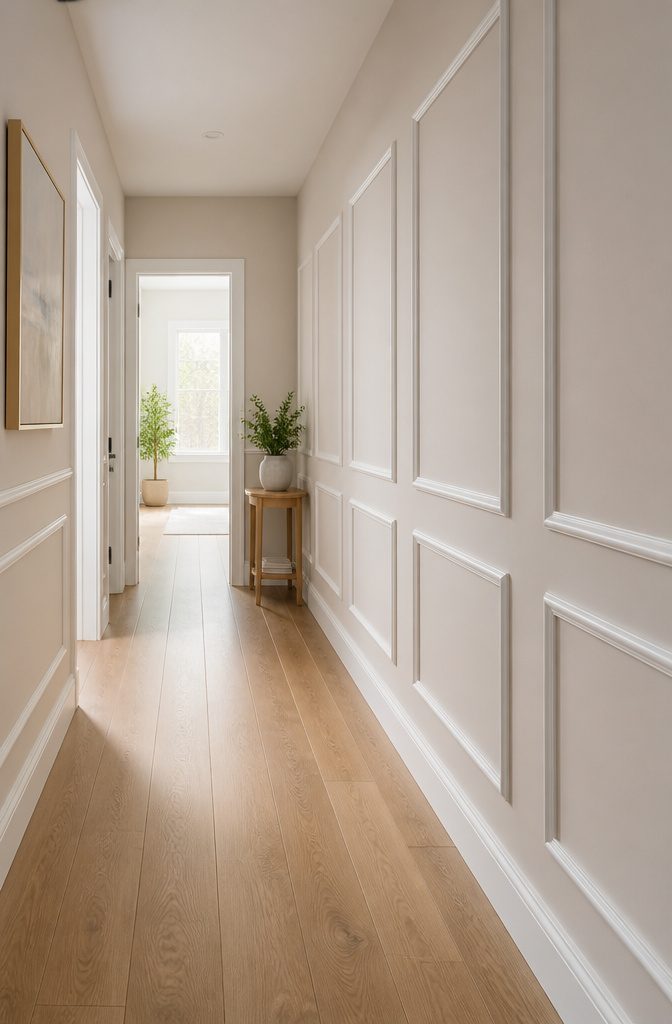
Picture frame moulding arranges thin strips into rectangular frames that sit flat against the wall, creating shadow lines where the center stays open.
The spacing math between frames matters more than the frames themselves. Measure the full wall, decide how many boxes you want, then subtract the total width of all vertical pieces before dividing the gaps.
That remainder is your spacing, and getting it wrong leaves a sliver at the end that no caulk hides.
A four-foot level will lie to you on any wall older than ten years. The bubble reads true, but the wall behind it bows.
I learned to snap chalk lines for every vertical and horizontal piece before the adhesive sets, then step back and look. The line catches what the level misses.
Applied wall moulding uses the same pine or MDF stock and runs about the same per foot. The difference is geometry: applied moulding runs in continuous strips or simple grids, while picture frame builds closed rectangles.
Applied work forgives small measuring errors because the pattern repeats; picture frame exposes every gap. For a weekend project with a single free Saturday, applied moulding asks less of your patience.

Easy Install Crown Molding Corners

Speed-Cope Crown Molding Jig: The Rockler Crown cutting jig lets you make tricky cope cuts with ease, for perfect molding faster. Our speed-cope helps and stabilizes the wood crown molding when making cope cuts with your jig saw.

NO MATH REQUIRED FOR PERFECT ANGLES: The aluminum protractor’s inner Miter Cut scale instantly gives the exact setting needed for corner joints, eliminating guesswork, calculations, and the waste of expensive trim material
Installation Tools and Measurements

A 25-foot tape and a 4-foot level live in my install bag because walls that look flat lie.
The level catches the high spots a straightedge misses, and the extra tape length matters when you are working out molding runs across a whole room rather than guessing piece by piece.
Surface prep is where I learned by doing. Cleaning off old caulk and loose paint takes longer than the actual install, but the trim grips better and the adhesive backing on some prefab panels actually sticks.
I skipped this once on a chair rail in a hallway with old gloss paint; the nails held, but the caulk line cracked within a month.
For cutting, a miter box works if you are patient and your corner angles are actually square. Mine rarely are, so a miter saw earns its floor space fast.
A nail gun with an adjustable depth stop beats hand-nailing for keeping thin trim from splitting, and the holes it leaves are small enough that a single swipe of wood filler disappears them.
Caulk goes on after filling, not before, because filler shrinks and caulk does not.
Material Choices
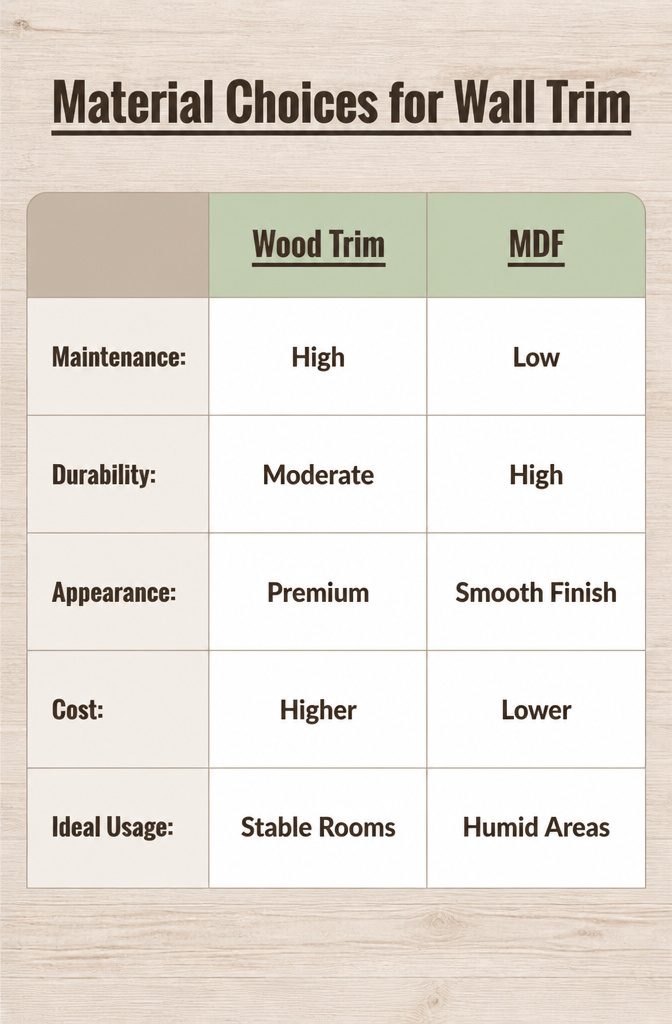
Wood trim still carries the premium feel, but the wrong species in the wrong room turns into a maintenance problem fast.
Solid pine wainscoting in my first bathroom started swelling at the joints within two winters. I learned the hard way that finger-jointed pine is fine for painted, climate-stable rooms and a liability anywhere humidity swings hard.
MDF gets dismissed as cheap, yet it paints smoother than almost anything and machines cleanly on a weekend.
My MDF wainscoting in the kids’ bathroom survived five years of slamming doors and toothpaste warfare before the moisture finally got in at the shoe molding.
PVC replacement entered year three looking identical, which says something about where synthetic materials earn their keep.
The paint-grade versus stain-grade fork matters more than the species choice itself. Stain-grade demands clear, continuous grain; paint-grade forgives a lot and lets you buy lower grades or engineered material without visual penalty.
Composite trim splits the difference, holding paint like MDF while resisting moisture better, though the surface never quite feels like wood under your hand.
Cost follows the same hierarchy you’d expect, but the spread narrows when you factor in priming and the sanding MDF requires.
For a rental or a first home with uncertain tenure, the calculation shifts toward whatever survives the timeline you actually have, not the forever house in your head.
Design Aesthetics by Room
Farmhouse shiplap in a 1920s Tudor reads as a costume that fights every original detail in the room.
The horizontal lines compete with leaded glass, plaster coving, and oak trim that already do the heavy lifting. I have seen that clash in person, and the fix is usually stripping it all back out, not layering more on top.
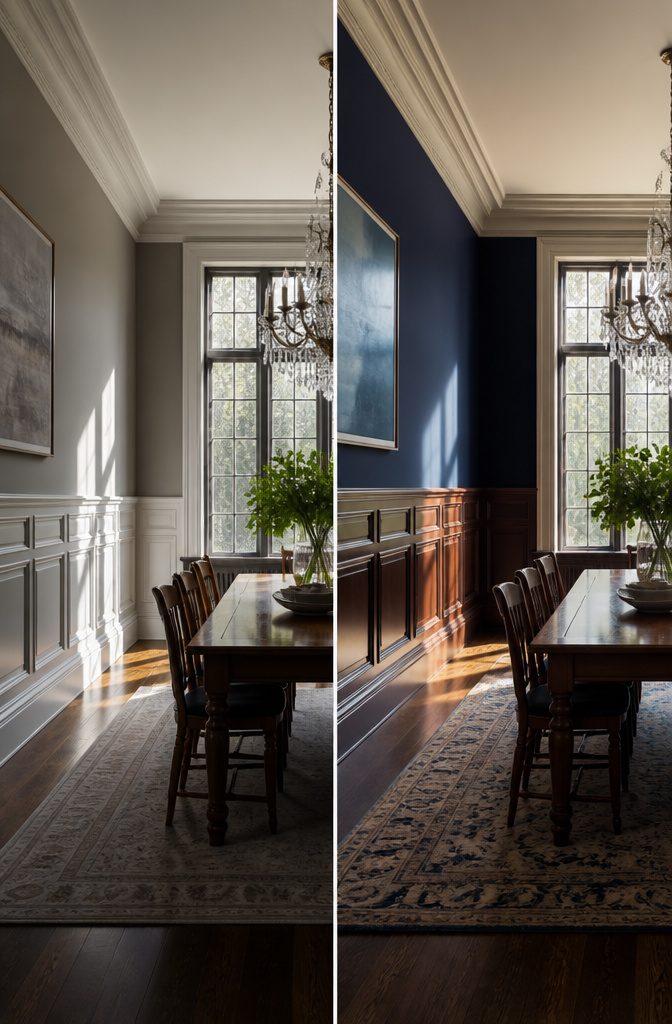
Raised panel wainscoting belongs in formal spaces, not breakfast nooks. The deep shadows and polished finish absorb morning light instead of bouncing it around, and the formality makes coffee and cereal feel like a board meeting.
In a dining room or library, those same panels add weight and history that flat drywall cannot touch.
Beadboard, by contrast, survives the casual rooms where raised panels suffocate.
A bathroom, a mudroom, the back of a pantry door: the narrow vertical grooves add texture without demanding attention, and the matte finish handles humidity and scuffs without looking wounded.
Picture frame moulding needs breathing room. Crowded onto every wall in a small living room, it becomes visual noise.
One accent wall, or a hallway where you pass rather than linger, lets the rectangles read as intentional architecture instead of clutter. The mistake is treating it as filler instead of punctuation.
Frequently Asked Questions
What are the different types of wall trim?
The main wall trim types are applied wall moulding, board and batten, raised panel moulding, beadboard, wainscoting, shiplap, crown moulding, chair rail, baseboards, and picture frame moulding.
Each creates a different visual effect, from the shadow lines of applied boxes to the formal depth of raised panels or the casual texture of beadboard.
Your choice depends on the room’s function, existing architecture, and how much installation time you have.
How do you install wall trim?
Start by cleaning the wall surface thoroughly so adhesive and caulk actually grip. Measure with a tape and a 4-foot level, since walls that look flat rarely are.
Cut with a miter saw for speed or a miter box for patience, then fasten with a nail gun set to avoid splitting thin trim. Fill nail holes before caulking, because wood filler shrinks and caulk does not.
What is trim vs molding?
In practice, the words are used interchangeably in American home improvement.
If there is any distinction, "trim" is the broader category that includes baseboards, chair rails, and any decorative strip at wall transitions, while "moulding" (or "molding") tends to mean shaped, profiled pieces like crown or picture frame strips.